Prerequisites: This tutorial assumes that you have already set up your Moxie.Build server and logged in. This page covers some of the basics that are involved in managing files and folders in the Moxie.Build system.
Getting Started
First of all, make sure you are logged in to your Moxie system as a user that has Admin access. If you're not already, click on the Me navigation dropdown then Admin to enter the Admin interface. After doing so, the navigation menu should look similar to the one pictured below. Click on Files.
![]()
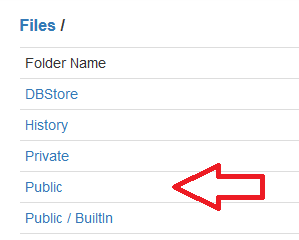
This is where you can see all of the folders that make up your website structure. Click on any folder name to view the files & sub-folders within that folder.
In order to use the Content Management System editor to insert files or images into a page, you must first upload the wanted files or images through this Files interface.
Creating Sub-folders
To keep your files organized, you should place them in appropriate sub-folders.
- Navigate to the folder you want to create a new sub-folder in. For example, select the Public folder.
- Select the Sub-Folders dropdown button and then choose New Sub-Folder.
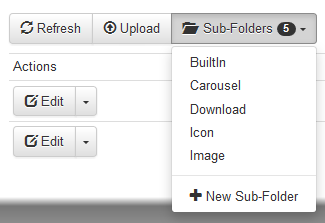
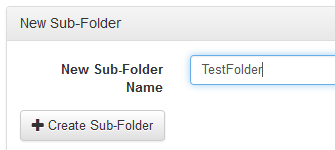
- Create a sub-folder with a name of your choice.
- Then, you'll see that your new sub-folder has been added to the Sub-Folders dropdown.

Uploading Files
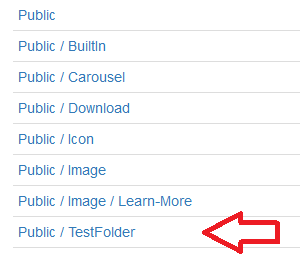
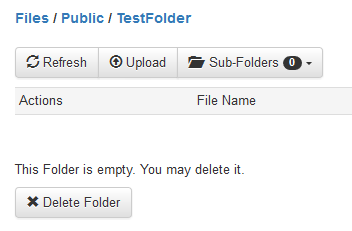
- Navigate to the folder you want to upload the file into. For example, select the Public / TestFolder folder you just created.
- Click the Upload button to upload a file into the current folder.
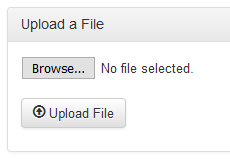
- First select the Browse... button, to choose a file from your computer. After that has been selected, select the Upload File button. Click the Close button to go back to your sub-folder's page.
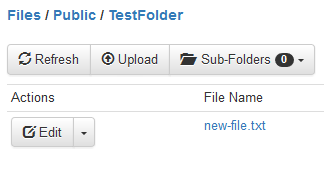
- Here you will see that your file has been uploaded.
Editing Files
Click on the Edit button beside any file name to bring up the edit page. This page will be different depending on what type of file you want to edit.
- For a text file, it will display a text box with a Save button at the bottom.
- For an image file, it will display an image size field with an Update button below it.
Copying Files
Click on the arrow beside the Edit button, then choose the Copy option to copy that file (this keeps the file in the original location and creates a copy in the new location).
- Copy to Folder: Choose the folder where you want the copy of the file to go to. If left blank, it will be copied into the same folder as the original file.
- New File Name: Change the name of the file. This can be left the same as the original if moving to a different folder, but if copying to the same folder it must be given a unique name.
Moving Files
Click on the arrow beside the Edit button, then choose the Move option to move that file (this removes the file from the original location).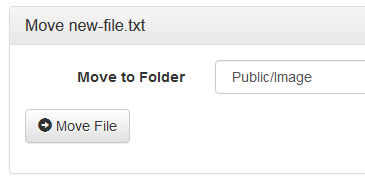
- Move to Folder: Choose the folder where you want the file to go to. This cannot be left blank.
Renaming Files
Click on the arrow beside the Edit button, then choose the Rename option to rename that file.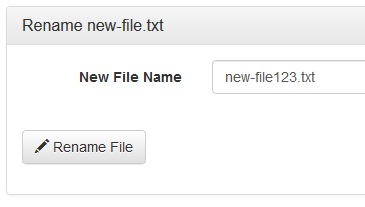
- New File Name: Choose a new name for the file. This may include a folder path to move and rename the file at the same time.
Example: Enteringnew-file123.textwill rename the file, and keep it in the same location. EnteringPublic/Image/new-file123.txtwill move it to the Public/Image folder, and rename the file.
Deleting Files
Click on the arrow beside the Edit button, then choose the Delete option to bring up the delete confirmation page.
- Click the Delete File button to delete that file.