Prerequisites: This tutorial assumes that you have already learned about Managing Files.
Getting Started
1. Create/Upload the template file and the folder:
a. Create the Template folder:
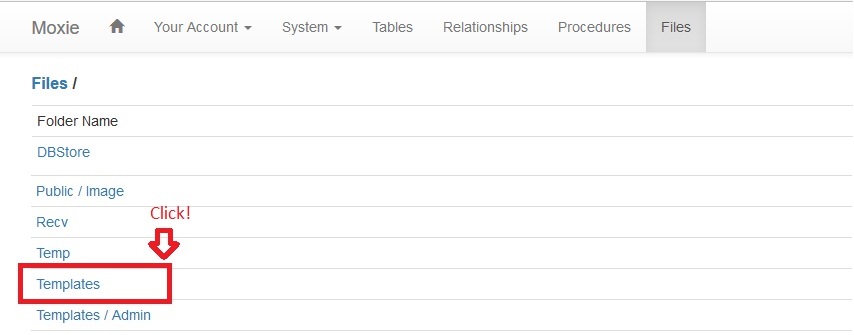
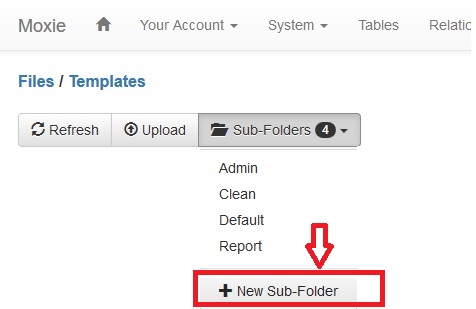
- Click the Templates folder in the Files. Then Click New Sub-Folder under the Sub-Folders dropdown menu and create the folder.


b. Upload the template file:
- After you created the template folder, click the folder you created. Then Upload the template file using the Upload button.
- Notice: For Moxie system, you must use a template file named Template.htm

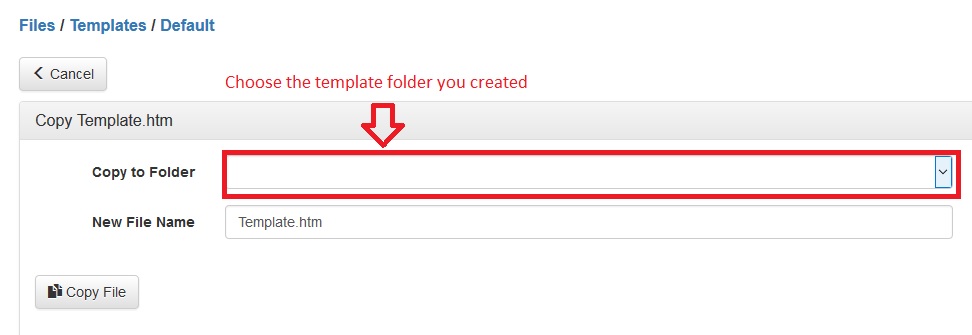
- Tips: If you don't know how to create the custom template files, please copy the default Moxie Template file to the template folder you created.
 >
> 
- Note: If you copy the default Moxie Template, you must change the href subfolder of Custom.CSS link (line #: 11)

2. Change the default template of the page you create to the custom template (this assumes that you have already gone through the Learn More About the Admin and Office Interface tutorial):
a. Click the = button and create a Procedure.


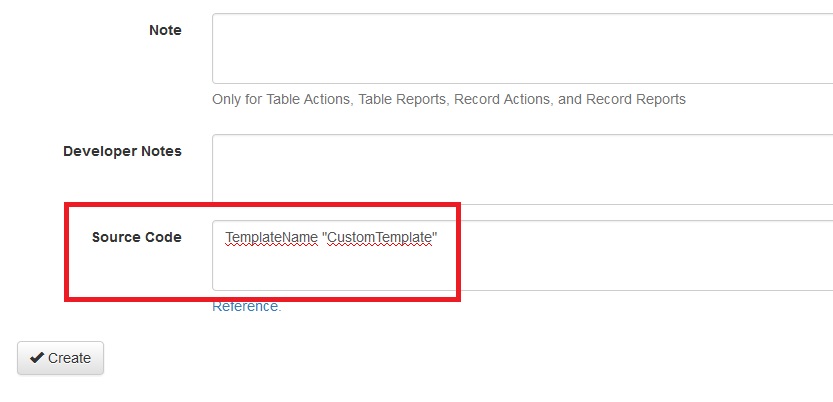
b. Add Moxie command TemplateName with template location (without '/template') in the Source Code field. Then create the procedure for the page.

3. Customize the CSS, JS, and HTML:
- You can add CSS and JS folders under the custom template folder. Then add the links on the custom template file.
- If using a third party Bootstrap theme, be sure to add the template insertion points you need, using the Default or Default5 template as an example. If your theme bundles Bootstrap within its own CSS and JS files, note the TMPLTYPE options for BYO as documented for the TemplateType command.
- Note that this page demonstrates how to work with the template files on a server that you do not have direct file access to. In most development cases you will have direct file access, and can just work with the files directly on your workstation.